How to Install Nextcloud on OpenMediaVault?
- To install Nextcloud on OpenMediaVault we just need to collect all the below-given content. After that, we can start the installation of our Nextcloud on OpenMediaVault.
OpenMediaVault Versions to Download:
OpenMediaVault 5 Installation Guide :
https://pcmac.biz/openmediavault-5-on-raspberry-pi/Software Required :
| Equipment Required | Optional | ||
| Raspberry Pi 4 | Case | ||
| SD Card | Raspberry Pi Keyboard | ||
| Ethernet Cable | Mouse | ||
| Power Adapter | |||
| External HDD | |||
| Shop now | |||
What is NextCloud?
Nextcloud is a suite of client-server software for creating and using file hosting services. It is functionally similar to Dropbox, although Nextcloud is free and open-source, allowing anyone to install and operate it on a private server. In contrast to proprietary services like Dropbox, the open architecture allows adding functionality to the server in the form of applications and enables users to have full control of their data. The original ownCloud developer Frank Karlitschek forked ownCloud and created Nextcloud, which continues to be actively developed by Karlitschek and other members of the original ownCloud team.

Access OpenMediaVault Web Interface
- To access the OpenMediaVault Web Interface we need to find the IP Address of our Raspberry Pi.
- To find out the IP we will use the Wireless Network Watcher and it will display the IP as shown below.

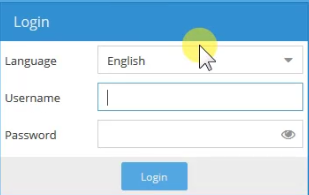
- Type this IP Address to your browser and it will open the login page for your OpenMediaVault.
- Now, you need to enter the username and password and login to your OpenMediaVault.
- OpenMediaVault Address = Your Raspberry Pi IP Address

In my case 192.168.1.73
Default Username : admin
Default Password : openmediavault
OpenMediaVault Configuration
- First of all open General Settings –> Web Administration change Port to 90 or any other port.
- Change Auto logout to Disabled.
- Now, Change the Web Administrative Password.
- After that, we need to navigate to services to SSH enable Permit root login.
Accessing SSH Console
- Now, we need to login, to SSH.
Default Username : root
Default Password : openmediavault
- On the first login, you need to change the password.
- Once the password is changed we need to go ahead with NextCloud Installation.
OpenMediaVault Apache and PHP Installation
Updating and Upgrading OpenMediaVault
apt-get update
apt-get upgrade
Installing Apache Web Server
apt-get install apache2
- To check the status of the Apache Web server, We will type OpenMediaVault Ip Address in the address bar.

- If you see this screen that means the Apache Web Server is working Fine.
Installing MariaDB DataBase
apt-get install apache2 mariadb-server libapache2-mod-php7.0
Installing PHP Packages
apt-get install php7.0-gd php7.0-json php7.0-mysql php7.0-curl php7.0-mbstring
apt-get install php7.0-intl php7.0-mcrypt php-imagick php7.0-xml php7.0-zip
- After the installation complete, we will restart the Apache Web Server.
Restarting Apache Web Server
service apache2 restart
Nextcloud on OpenMediaVault Installation
Navigate to HTML Directory
cd /var/www/html
Downloading and Extracting NextCloud using the Curl command
curl https://download.nextcloud.com/server/releases/nextcloud-14.0.3.tar.bz2 | sudo tar -jxv
Creating a Data Directory for NextCloud to save the Information
sudo mkdir -p /var/www/html/nextcloud/data
Allocate Control of NextCloud folder to Correct User and Group
sudo chown -R www-data:www-data /var/www/html/nextcloud/
Assign permissions to the NextCloud DATA folder.
sudo chmod 750 /var/www/html/nextcloud/data
- Once the installation finished we can finally move to the NextCloud login process.
- To begin to go to your Raspberry Pi’s IP address/nextcloud. For example, In my case: –192.168.1.73/nextcloud
- Once you type the correct address you will be redirected to NextCloud Login Screen.

- Here you can type your username and password that you want to use as an Admin Account.
- If you want to use the NextCloud from outside your network, we recommend you to choose a strong password.
- Once you are happy with your settings, press the “Finish Setup” button, to finalize the setup process.
- It might take some time to finish the setup. So, please wait and don’t refresh the page.
Access NextCloud from Internet
- To access the NextCloud from Internet, we need to complete 3 steps.
Port Forwarding
Setup Dynamic DNS [In case you don't have a Static Public IP Address]
Add website to Trusted Domains
Setting up Port Forwarding on Router
- To forward the port on the router, we need to know the IP Address of our router.
- To check the router IP Address we can use the Wireless Network Watcher.
- It will display the router IP Address as shown below.

- Type this IP Address to your browser and it will open the login page for your router.
- Now, you need to enter the username and password and login to your router.
- If you don’t know the username and password of your router you can always ask your ISP.
- For personal routers, you can always check online for the default username and password for the router.
- In my case I need to navigate to services and then move to Port Forwarding, Your’s might be different.
- Then you need to forward port 80 and 443, to the Raspberry Pi IP Address.

Setting up Dynamic DNS
- First of all, we need to visit the DUCKDNS website to create a Free Dynamic DNS Domain for us.

- You can use any of the above methods to login to the DUCKDNS website and create a sub-domain for your website.
- Once you logged in then create a sub-domain for your NextCloud and can visit NextCloud by that address.

- For example, in my case, I have created omvpcmac as my subdomain.
- So, I can access it as omvpcmac.duckdns.org.
- You can create 5 subdomains on the Duck DNS account for free.
Add website to Trusted Domains
- To add our website to Trusted Domain’s we need to edit the NextCloud Configuration file.
- We can either use WinSCP and we can use nano command to edit the file.
Edit NextCloud’s Configuration File
sudo nano /var/www/html/nextcloud/config/config.php
- Now, in the configuration file, we need to add our website to the Trusted Domains.
'trusted_domains' => array ( 0 => '192.168.1.73', ),
- In my case, I have added my duckdns.org sub-domain to NextCloud Trusted Domain.
- So, we need to make another entry by increment the array ID.’trusted_domains’ =>
'trusted_domains' =>
array (
   0 => '192.168.1.73',
   1 => 'omvpcmac.duckdns.org',
),
- Now we can save and quit out of the file by pressing Ctrl+X then pressing Y and then Enter.
- If you follow the video and the tutorial correctly, your NextCloud should work now.
- Connect the External HDD to Raspberry Pi
- From the NextCloud Menu select Apps and then enable “External Storage Support“.
- After that, we need to open Putty, log in with root user, and type these commands.
sudo chown -R www-data:www-data /path/to/localdir sudo chmod -R 0750 /path/to/localdir
- You can find the path to Local Drive from File System options in OpenMediaVault.

- Now, you can go ahead and mount your External HDD in NextCloud.
- You need to navigate to “Settings –> Administration –> External Storages“ and configure the path of HDD.

In conclusion
- You are ready to use NextCloud on OpenMediaVault on your Raspberry Pi.
- If you come across any issues or have some feedback related to this tutorial, Please share your thoughts.
Please check out my other articles:
- How to install OpenMediaVault 5 on Raspberry Pi All Models
- OpenMediaVault 5 NAS Server on Raspberry Pi 4
- Plex Media Server on OMV 5 inside Docker with Portainer using RPi 4
- How to Install Radarr on OpenMediaVault 5 inside Docker with Portainer using RPi 4
Did you find us helpful?
| Subscribe our YouTube Channel | |
| Support us on Patreon | |
| Like us on Facebook | |
| Share This Article with others | |


Hi!
I did all your commands but my apache web server not working.
After apt-get install apache2 it shows that it installed all all of the other command working perfectly.
But when I get command service apache2 restart i see error:
root@raspberrypi:~# sudo service apache2 restart
Job for apache2.service failed because the control process exited with error code.
See “systemctl status apache2.service” and “journalctl -xe” for details.
And when i put OMV ip adress i will no see some Apache web server first page.
What can I do with this?
Thank you.
This tutorial is done on Openmediavault 3, please wait for the new tutorial coming soon.
welcome
This version of Nextcloud is not compatible with > PHP 7.2.
You are currently running 7.3.14-1~deb10u1.
I’m seeing this error as well. @Harish Kumar can you update this article please.
Need to publish new article.
I think you need to update all the php7.0 to 7.1
Hello sir, it’s impossible for me to access root via ssh… My console says access denied when I type in the password. I changed the admin password, the pi password. I don’t understand.. Can you help me?
Best regards
Please update the article with OMV5+RPi4+SSL
can you help me to understand how to separate openvault and apache webaccess. bec now if you input Rpi ip address, we see apache not openvault, how to access to openvault web interface in that case?
You need to set openmediavault on different port.