In this segment, we are going to show you how to install and configure OpenMediaVault 6 on Raspberry Pi
In the world of digital media, managing your files and multimedia content efficiently is key to enjoying a seamless entertainment experience. OpenMediaVault (OMV) stands out as a robust, open-source network-attached storage (NAS) solution that empowers users to organize, share, and stream their media effortlessly. With the release of OpenMediaVault 6, Raspberry Pi enthusiasts can now leverage the power of this platform on their compact yet versatile single-board computers. In this guide, we’ll walk you through the process of installing and configuring OpenMediaVault 6 on Raspberry Pi, transforming it into a powerful media server.
| Equipment Required | Optional | ||
| Raspberry Pi 4 | Case | ||
| SD Card | Keyboard | ||
| Ethernet Cable | Mouse | ||
| Power Adapter | |||
| External HDD | |||
| Shop now | |||
You can Buy the Raspberry Pi 4 Kit from here: https://amzn.to/3TDrsEK
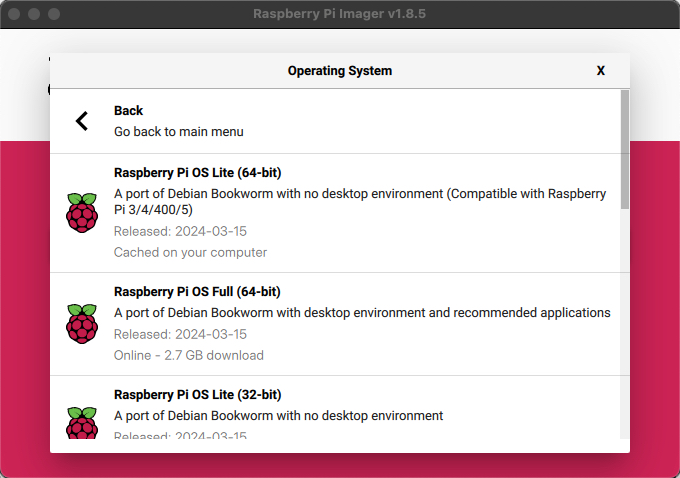
Step 1: Flash the Image to a MicroSD card / Flash Drive / HDD
Use Raspberry Pi Imager to flash the Raspberry Pi Lite image onto your MicroSD card / Flash Drive / HDD. As shown in the below image.
Step 2: Boot Raspberry Pi
Insert the MicroSD card into your Raspberry Pi and power it up. The initial boot may take a few minutes as the system configures itself.
Step 3: Prepare Your Raspberry Pi
Note: We need to install the Raspberry Pi Lite image for OpenMediaVault to work; the desktop version image will not work. We can use Raspberry Pi Imager to install the image on our Pi. We can either use an SD card or a USB drive for this process. Once the installation is complete, we can boot the Raspberry Pi.
Before diving into the installation process, ensure your Raspberry Pi is up-to-date. You can achieve this by running the following commands in the terminal:
sudo apt update
sudo apt upgrade
Step 4: Download OpenMediaVault Image
Once the update and upgrade are complete, we can use the below command to install OpenMediaVault.
wget -O - https://github.com/OpenMediaVault-Plugin-Developers/installScript/raw/master/install | sudo bash
Step 5: Access OpenMediaVault Web Interface
Once the initial configuration is complete, you can access the OpenMediaVault web interface by entering the IP address of your Raspberry Pi into a web browser. The default username is “admin,” and the default password is “openmediavault”.
Step 6: Configure Storage
Navigate to the Storage section in the web interface to set up your storage devices. You can add external drives or configure your MicroSD card for storage.
Step 7: Create Shared Folders
Under the Shared Folders section, create folders to organize your media files. You can set permissions and access rights for each folder as per your requirements.
Step 8: Configure Services
Head to the Services section to configure services like SMB/CIFS, FTP, or NFS for file sharing across your network.
Step 9: Security Measures
Ensure your OpenMediaVault installation is secure by changing default passwords, enabling firewall settings, and regularly updating the system.
Step 10: Enjoy Your Media Server
With OpenMediaVault successfully installed and configured on your Raspberry Pi, you now have a powerful media server at your fingertips. Upload your media content, configure streaming services, and enjoy seamless access to your favorite movies, music, and photos across your network.
Conclusion:
By following this comprehensive guide, you can transform your Raspberry Pi into a feature-rich media server using OpenMediaVault 6. Whether you’re a casual media enthusiast or a tech-savvy user, OpenMediaVault offers the flexibility and performance needed to manage your digital media collection effortlessly. Explore its myriad features, customize your setup, and unlock the full potential of your Raspberry Pi as a media powerhouse.
Please check out my other articles:
Did you find us helpful?
| Subscribe to our YouTube Channel | |
| Support us on Patreon | |
| Like us on Facebook | |
| Share This Article with others | |