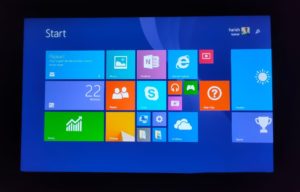
In this segment, we are going to show you how to fix the issue with Dell Venue Tablet’s “Internal Hard Disk not found”

Internal Hard Disk not found
- To resolve this problem with our Dell Venue Tablet, we need to have the below-given equipment with us.
| Micro USB OTG Hub | |
| Flash Drive | |
| Keyboard & Mouse | |
| Desktop or Laptop |
Note: If you purchase the above OTG cable then you don’t require a USB HUB.
- Before collecting any equipment we should go ahead and download the required operating system for our Tablet. Recommended [32-Bit version for Tablet]
Official Windows Download: https://www.microsoft.com/en-in/software-download/
- Now I can assume that we have both Hardware and Software that is required by this project. So, we can start resolving the issue now.
Things to remember
| First, we need to ensure that our Tablet is charged for more than 75%. Because we can’t charge the device in between the installation. | |
| Secondly, we need to write the image to our Flash Drive with the help of Rufus. Steps to Flash image from Rufus. | |
| Thirdly, we also need to download the Operating System Drivers and copy them to the same Flash drive which has the Operating system installed. | |
| Finally, we need to Disable Secure Boot from our Tablet. Follow the steps given below |
Steps to enter into BIOS
Without an External USB Keyboard:
- Press and hold the Power + Volume down button to power up the system in BIOS mode.
- Leave the button when you see a progress bar.
![]()
Using an External USB Keyboard:
- Before entering the System Setup, connect the USB HUB to the Tablet with the help of OTG cable. Now, connect your Keyboard and mouse to USB Hub.
- Turn on (or restart) the system.
- Before the Dell Logo is displayed, press the F2 key immediately.
- If the operating system logo appears instead of the BIOS screen, repeat the third step again by shutting down the system.
Disable Secure Boot
- Now as you are in BIOS navigate to security and then disable secure boot as shown below.
- After that press the F10 key to save the changes and restart the system. Before restarting please connect the Flash drive that contains the Windows Operating System.
Installing Operating system
- After the restart cycle complete you will see the setup screen started automatically on the Tablet.
- Follow the steps to install your new Windows Operating System to your Dell Tablet.
- Once the installation finishes, we can install the drivers which we have already saved on the Flash Drive.
You may also Like our other articles
- Free VPN Lifetime Windows & Android
- Lifetime Free VPN for Windows & Android
- Setup Lifetime Free VPN for Windows – without Software
Did you find us helpful?
| Subscribe our YouTube Channel | |
| Support us on Patreon | |
| Like us on Facebook | |
| Share This Article with others | |


Hi there,
this is a very good blog I appreciate your work. thanks for sharing such a useful information. Visit my blog
Welcome.