In this segment, we are going to show you how to configure “Pi-Hole on Docker with Portainer using OpenMediaVault 5 Raspberry Pi 4 “
What is Pi-Hole?
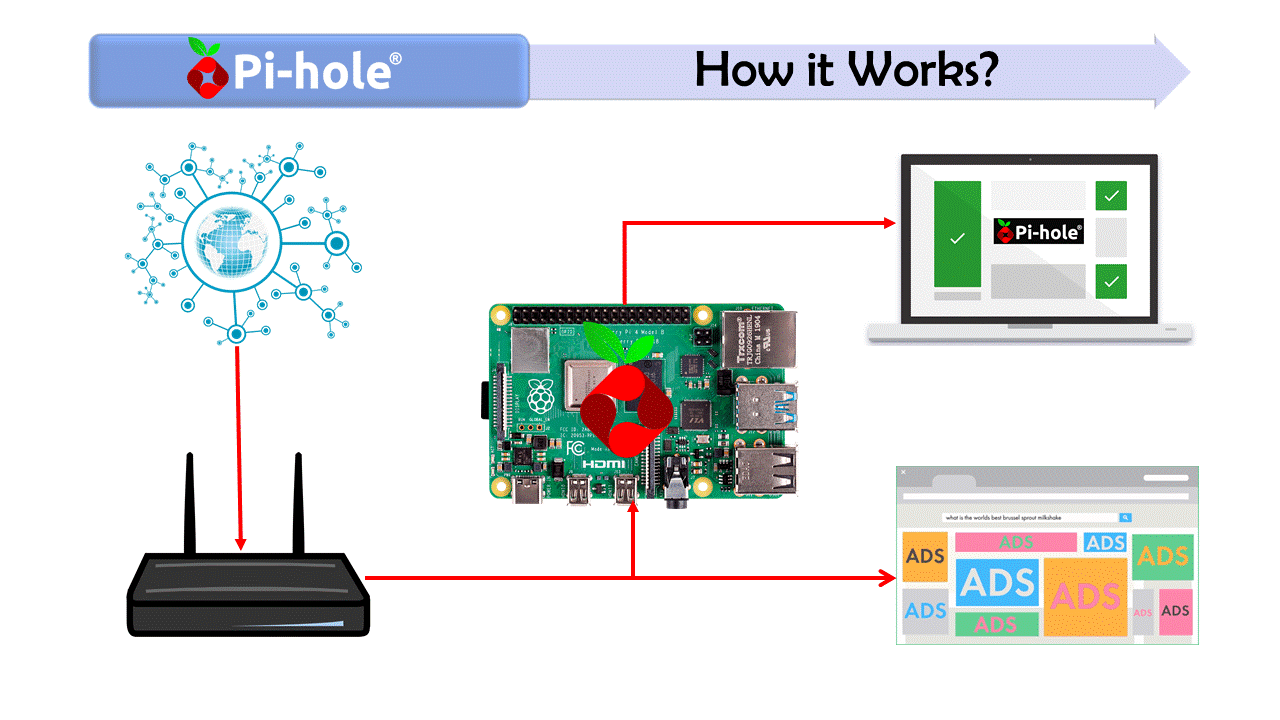
 | Pi-hole is a free and open-source network-wide adblocker. This allows traffic to pass through its DNS server and block the predefined queries from the internet. It is based on Linux network-level advertisement and Internet tracker blocking the application. |
OpenMediaVault Versions :
OpenMediaVault 5 Installation Guide :
https://pcmac.biz/openmediavault-5-on-raspberry-pi/Software Required :
| Equipment Required | Optional | ||
| Raspberry Pi 4 | Case | ||
| SD Card | Raspberry Pi Keyboard | ||
| Ethernet Cable | Mouse | ||
| Power Adapter | |||
| External HDD | |||
| Shop now | |||
We may earn a commission for purchases using our links. Learn more.
Checkout official website: pi-hole
Docker-compose
version: "3"

# More info at https://github.com/pi-hole/docker-pi-hole/ and https://docs.pi-hole.net/
services:
  pihole:
    container_name: pihole
    image: pihole/pihole:latest
    ports:
      - "53:53/tcp"
      - "53:53/udp"
      - "67:67/udp"
      - "80:80/tcp"
      - "443:443/tcp"
    environment:
      TZ: 'Asia/Kolkata'
      # WEBPASSWORD: 'set a secure password here or it will be random'
    # Volumes store your data between container upgrades
    volumes:
       - './etc-pihole/:/etc/pihole/'
       - './etc-dnsmasq.d/:/etc/dnsmasq.d/'
    dns:
      - 127.0.0.1
      - 1.1.1.1
    # Recommended but not required (DHCP needs NET_ADMIN)
    #   https://github.com/pi-hole/docker-pi-hole#note-on-capabilities
    cap_add:
      - NET_ADMIN
restart: unless-stoppedNote: Please change the OMV default port from 80 to something else and then start with
sudo apt update
sudo apt dist-upgrade
Configuring Openmediavault Network Interface
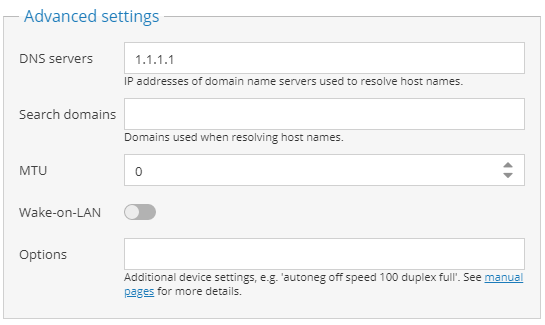
- First, we need to configure our DNS servers from Openmediavault Network Interface. Here we need to navigate to Network –> Interfaces and edit the Network.
- However, we need to configure the DNS Server from Advanced settings to 127.0.0.1 or 1.1.1.1 as shown in Pi-Hole Docker-compose.
Create Macvlan Network for Pi-Hole
- Once the DNS is successfully configured then we need to open Putty and login to our OpenMediaVault with root user.
- After that, enter the below-given command to create Macvlan network for Pi-Hole. Remember to change the subnet to your OpenMediaVault IP Address.
docker network create -d macvlan \
    --subnet=192.168.1.10/24 \
    --gateway=192.168.1.1 \
    -o parent=eth0 pub_net
Configure Pi-Hole container
[wptabs id=”6196″]
- Finally, once everything is done we can go ahead and click on Deploy the container.
Access Pi-Hole Server Web Interface
- To access the Pi-Hole web interface we need to type the Pi-Hole IP Address/admin.
- However, our Pi-Hole is not yet ready for blocking Ads on our Network. We need to update Pi-Hole IP Address to our Router DNS.
http://Pi-Hole IP Address/admin/
Updating Pi-Hole IP Address to Router DNS
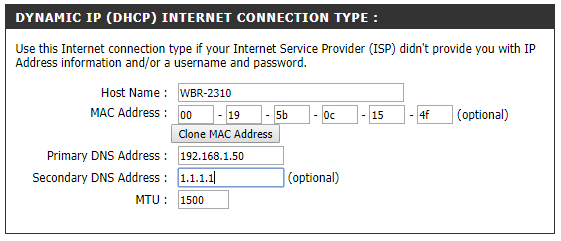
- At this moment we need to log in to our Router, then Navigate to DNS Settings.
- After that, we need to enter the Pi-Hole IP Address to our Router Primary DNS Address.
- Finally, all the traffic will route through the Raspberry Pi and Block ads with Pi-Hole.
Primary DNS Address   : "Pi-Hole IP Address"
Secondary DNS Address : "Cloudflare DNS Address i.e 1.1.1.1"
Reset Pi-Hole Password
- If you forgot the Pi-Hole password you can reset it anytime by using this command inside Terminal.
docker exec -it pihole pihole -a -p
In conclusion
- Above all steps will convert your Raspberry Pi 4 as Pi-Hole Network Wide Ad-Block Server.
- If you face any issue regarding this article please share your thoughts.
- Enjoy using Pi-Hole on Docker using Openmediavault. Smile (.”_”.)
Please check out my other articles:
- How to install OpenMediaVault 5 on Raspberry Pi All Models
- OpenMediaVault 5 NAS Server on Raspberry Pi 4
Did you find us helpful?
| Subscribe our YouTube Channel | |
| Support us on Patreon | |
| Like us on Facebook | |
| Share This Article with others | |


Hello, thanks for the amazing work on this guide however may I ask as a novice in the container field was there a portion missing of this guide that was meant to be assumed? mostly pertaining to Docker? I know how to install docker..can’t figure out the docker part 🙁
Please check the openmediavault playlist you will find the guide over there on YouTube.
no matter what I try, how i try..different SD cards etc… I get this error when trying to make ANY changes in openmediavault
“Failed to execute command ‘export PATH=/bin:/sbin:/usr/bin:/usr/sbin:/usr/local/bin:/usr/local/sbin; export LANG=C.UTF-8; omv-salt deploy run systemd-networkd 2>&1’ with exit code ‘1’: raspberrypi: ———- ID: configure_etc_network_interfaces Function: file.managed Name: /etc/network/interfaces Result: True Comment: File /etc/network/interfaces is in the correct state Started: 19:08:57.134029 Duration: 80.373 ms Changes: ———- ID: remove_systemd_networkd_config_files Function: module.run Result: True Comment: file.find: [] Started: 19:08:57.216200 Duration: 3.517 ms Changes: ———- file.find: ———- ID: remove_empty_systemd_networkd_config_files Function: module.run Result: True Comment: file.find: [] Started: 19:08:57.220028 Duration: 2.975 ms Changes: ———- file.find: ———- ID: remove_netplan_config_files Function: module.run Result: True Comment: file.find: [‘/etc/netplan/10-openmediavault-default.yaml’, ‘/etc/netplan/20-openmediavault-eth0.yaml’, ‘/etc/netplan/20-openmediavault-eth1.yaml’, ‘/etc/netplan/20-openmediavault-veth9dc499e.yaml’] Started: 19:08:57.223305 Duration: 3.975 ms Changes: ———- file.find: – /etc/netplan/10-openmediavault-default.yaml – /etc/netplan/20-openmediavault-eth0.yaml – /etc/netplan/20-openmediavault-eth1.yaml – /etc/netplan/20-openmediavault-veth9dc499e.yaml ———- ID: configure_netplan_default Function: file.managed Name: /etc/netplan/10-openmediavault-default.yaml Result: True Comment: File /etc/netplan/10-openmediavault-default.yaml updated Started: 19:08:57.227589 Duration: 21.718 ms Changes: ———- diff: New file mode: 0644 ———- ID: configure_netplan_ethernet_eth0 Function: file.managed Name: /etc/netplan/20-openmediavault-eth0.yaml Result: True Comment: File /etc/netplan/20-openmediavault-eth0.yaml updated Started: 19:08:57.249618 Duration: 71.522 ms Changes: ———- diff: New file mode: 0644 ———- ID: configure_netplan_ethernet_eth1 Function: file.managed Name: /etc/netplan/20-openmediavault-eth1.yaml Result: True Comment: File /etc/netplan/20-openmediavault-eth1.yaml updated Started: 19:08:57.321573 Duration: 64.298 ms Changes: ———- diff: New file mode: 0644 ———- ID: configure_netplan_ethernet_veth9dc499e Function: file.managed Name: /etc/netplan/20-openmediavault-veth9dc499e.yaml Result: True Comment: File /etc/netplan/20-openmediavault-veth9dc499e.yaml updated Started: 19:08:57.386233 Duration: 58.607 ms Changes: ———- diff: New file mode: 0644 ———- ID: apply_netplan_config Function: cmd.run Name: netplan apply Result: False Comment: Command “netplan apply” run Started: 19:08:57.446814 Duration: 273.291 ms Changes: ———- pid: 6100 retcode: 78 stderr: /etc/netplan/20-openmediavault-eth1.yaml:5:20: Error in network definition: Invalid MAC address ”, must be XX:XX:XX:XX:XX:XX macaddress: ^ stdout: Summary for raspberrypi ———— Succeeded: 8 (changed=8) Failed: 1 ———— Total states run: 9 Total run time: 580.276 ms”
Please contact me on Telegram, I will help you.
Three quick questions: Any particular reason why you suggest moving OMV away from port 80 and give it to the pihole rather than simply mapping the pihole port 80 to an unused port?
Second question: Why use a macvlan in a setup where pihole is running under the same IP as OMV? My intuition would have been that host networking would be the best choice under these conditions. Isn’t the main advantage of the macvlan setup that the pihole will get its own IP address so that you don’t have to worry about port conflicts with the host? (This is how I am currently running my pihole, but the downside is that host and pihole cannot communicate with each other when the pihole is on the macvlan. So I’m thinking about changing it to the host network… Am I missing something?)
Third question: Why would I set my DNS server on OMV to 1.1.1.1. given that the whole point of running a pihole is to use it as your DNS?
Hi,
Please check out your answers.
Answer 1: I don’t want any conflict in my tutorial. So, I move OMV to port 90.
Answer 2: Using Macvlan will give us a separate IP for Pi-Hole. If you want Pi-Hole on the same IP you can follow another article from my website.
Answer 3: Pi-Hole use Cloudflare DNS to block request, you can also use other DNS servers.
Thanks for writing to us.
Thanks for the tutorial. But the macvlan is probably messing something up. I set up :
docker network create -d macvlan \
–subnet=192.168.1.100/24 \
–gateway=192.168.1.1 \
-o parent=eth0 pub_net
My omv was on 100 and my router is on 1.
and then chose 192.168.1.50 for the pi-hole.
The pihole works fine but now I cannot access anymore 192.168.1.100 where is OMV and all my other containers…so completely stuck here, any suggestion to solve that?
Thanks,
Great tutorial! Works great deploying thru the portainer gui. I would like to deploy it thru the stack/web editor of portainer. With the pihole_net network already created, what is the syntax to add to the the network settings in the docker-compose, I’m assuming under Network:
Thanks
Hello, thanks for your tutorial. I have an issue when starting the container. I have posted a Question on StackOverflow, maybe you can have a look at it? https://stackoverflow.com/questions/65450780/pihole-on-raspberry-pi-with-openmediavault-using-docker-and-portainer
[…] I am currently following this tutorial with a clean OpenMediaVault installation on my Raspberry Pi 4: https://pcmac.biz/pi-hole-on-openmediavault-5-inside-docker-with-portainer-using-raspberry-pi-4/ […]