In this tutorial, we are going to install “Netflix on Raspberry Pi 3 Model B”
Netflix: Visit KonstaKANG Official Website for more Cool Stuff.
What is Netflix?
Netflix, Inc. (/ˈnɛtflɪks/) is an American media services provider and production company headquartered in Los Gatos, California, founded in 1997 by Reed Hastings and Marc Randolph in Scotts Valley, California. The company’s primary business is its subscription-based streaming service which offers online streaming of a library of films and television programs, including those produced in-house. As of April 2019, Netflix had over 148 million paid subscriptions worldwide, including 60 million in the United States, and over 154 million subscriptions total including free trials. It is available worldwide except in mainland China (due to local restrictions), Syria, North Korea, and Crimea (due to US sanctions). The company also has offices in the Netherlands, Brazil, India, Japan, and South Korea. Netflix is a member of the Motion Picture Association (MPA).
Source /> Wikipedia

Software Required :
| Equipment Required | Optional | ||
| Raspberry Pi 4 | Case | ||
| SD Card | |||
| Ethernet Cable | |||
| Power Adapter | |||
| Raspberry Pi Keyboard | |||
| Mouse | |||
| Shop now | |||
Raspberry Pi 4 Kit’s
Active Cooling Solutions
Passive Cooling Solutions
Compatible Mini Keyboard & Air Remote
We may earn a commission for purchases using our links. Learn more.
Watch our latest Video
Plasma Bigscreen – Android TV Replacement for Raspberry Pi 4
STEP- 1: Downloading & Installing “Android TV on Raspberry Pi”
- First of all, we need to download the “Android Pie“ image to setup Raspberry Pi.
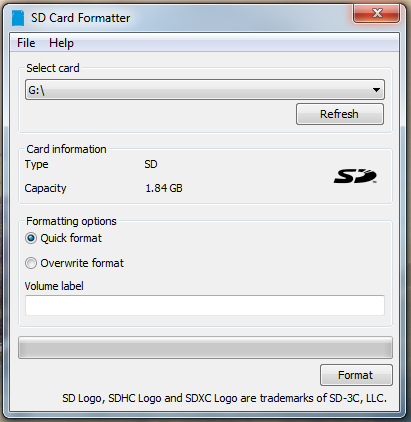
Formatting the SD Card
- Now, We need the SD Card Formatter tool to format the SD card.
- Once, the card is plugged in, It will automatically detect by the computer then you need to click on the format to format the Card.
Flashing the SD Card
- After the SD card formatted successfully then we use Etcher and flash the Android Pie image to the SD card.

Insert the SD Card to Raspberry Pi
- Once the card successfully got flashed then plug it in the Raspberry Pi. Follow the setup wizard to boot into Android Home Screen.
STEP- 2: Downloading Open Gapps
Visit the Official Open Gapps Website.
- Select the Package as shown in the picture for minimum apps requirement. After that click on the download button to download the file.

STEP- 3 : Enabling “Developer options”, “Root Access”, “Terminal”
Enable Developer Options
- To enable Developer Options, We need to navigate to Settings –-> “About phone“ –> Click “Build Number“ several times.
Enable Root Access
- To enable Root Access, We need to navigate to “Settings“ -> “Developer Options“ -> Enable “Root Access“.
 Enable Terminal
 Enable Terminal
- To enable Terminal Access, We need to navigate to “Settings“ –> “Developer Options“ –> Enable “Local Terminal“.
- Now, we need to reboot the device.
- Press & Hold F5 key, this will bring Power Options and you can reboot the device.
STEP- 4: Boot into “TWRP Recovery Mode”
Boot Android into TWRP Recovery Mode
- Open the Terminal App, Then type the below-given commands to Boot into “TWRP Recovery Mode“.
su
rpi3-recovery.sh
reboot
STEP- 5: Boot out from “TWRP Recovery Mode”
Boot into Normal Mode
- Now, navigate to install and select the file from the storage. i.e recovery2boot.zip
- This file will boot our system into Normal Mode.
STEP- 6: Installing Open Gapps in Android Pie
Boot Android into TWRP Recovery Mode
- Open the Terminal App, Then type the below-given commands to Boot into “TWRP Recovery Mode“.
su
rpi3-recovery.sh
reboot
- Now, navigate to install and select the file from the storage. i.e open_gapps-arm-7.1-tvstock-xxxxxxxxxxx.zip.
- Now, once the installation finishes. Then go back and select wipe –> Wipe Factory Reset
Boot into Normal Mode
- Now, navigate to install and select the file from the storage. i.e recovery2boot.zip
- This file will boot our system into Normal Mode.
STEP- 7: Installing Netflix APK
Download the Netflix apk from the link
- Enable the unknown source setting when it asks and after that install the APK again.
STEP- 8: Installing Sideload Launcher APK
Download the Sideload Launcher apk from the link
- Install the APK and you will see the shortcut icon on the screen.
STEP- 9: Settings need to be changed
Enable Developer Option by clicking on Build Number 7 times from About Phone
Windows Animation Scale : Turn Off.
Transition Animation Scale : Turn Off.
Animator Duration Scale : Turn Off.
Thanks to KonstaKANG for his Cool Stuff. Please support his work
In conclusion
- You are ready to use Netflix on your Raspberry Pi 4.
- If you come across any issues or have some feedback related to this tutorial, Please share your thoughts. Smile (“_”)
Please check out my other articles:
Did you find us helpful?
| Subscribe our YouTube Channel | |
| Support us on Patreon | |
| Like us on Facebook | |
| Share This Article with others | |

Hi,
thank you for your Netflix installation guide on Raspberry Pi3.
I followed this guide untill the step 6, where I was installed the file “open_gapps-arm-7.1-tvstock”. After that the system reboot in Normal Mode and stop here, showing the line blue whit the circle passing from rigth to left more thath one hour.
Any sugesstion, pleasse.
https://www.youtube.com/watch?v=I_vhgriOd1E
use this video.