In this segment, we are going to show you “How to Install Plasma Bigscreen on Raspberry Pi 4 with Overclocking up to 2 GHz“
What is Plasma Bigscreen?
Plasma Bigscreen is KDE’s user interface for big TV screens. Plasma Bigscreen powers the interface on a Single Board Computer and uses the Mycroft AI voice assistant to provide a Smart TV platform. It will deliver not only media-rich applications but also traditional desktop applications redesigned to fit the Bigscreen experience.
Official Website // Plasma Bigscreen
Software Required :
| Equipment Required | Optional | ||
| Raspberry Pi 4 | Case | ||
| SD Card | Raspberry Pi Keyboard | ||
| Ethernet Cable | Mouse | ||
| Power Adapter | |||
| External HDD | |||
| Shop now | |||
Note: Overclocking may damage your Raspberry Pi, for that reason you must have a good cooling system installed on your Raspberry Pi 4 Before overclocking.
Overclock at your own risk.
Raspberry Pi 4 Kit’s
Active Cooling Solutions
Passive Cooling Solutions
Compatible Mini Keyboard & Air Remote
We may earn a commission for purchases using our links. Learn more.
Plasma Bigscreen Setup on Raspberry Pi 4
- First of all, to start this project we need to download the Plasma Bigscreen Image from the download link.
Formatting the SD Card
- Secondly, we need the SD Card Formatter tool to format the SD card.

Flashing the SD Card
- Followed by writing the image to the SD Card using: Etcher

Setting up Raspberry Pi
- Finally, plugin the SD Card, connect the Ethernet Cable and Power Supply to complete the setup.
- Now we can turn on the Raspberry Pi 4 to boot the Plasma Bigscreen.
Overclocking Raspberry Pi 4
Maximum Overclock for Raspberry Pi 4: 2.147 GHz max clock speed GPU Frequency: 750 We are going to overclock are system from 700 MHz to 2000 MHz. We also change the over voltage to 6 for maximum power.
- To start with overclocking raspberry pi 4, we need to open Konsole from Plasma Bigscreen and then update & dist-upgrade our system to the latest build available.
sudo apt update
sudo apt dist-upgrade
- Once the update & upgrade process finishes you can go ahead and reboot the system:
sudo reboot
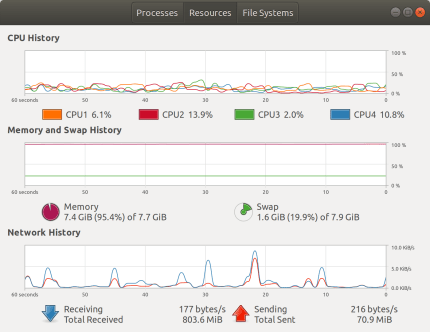
- Before overclocking the Raspberry Pi 4 we need to install system monitor to watch our system performance. Here we can see the CPU performance for our Plasma Bigscreen operating System.
sudo apt-get install gnome-system-monitor

- Now we can power off the device and then connect the SD card to the computer, then you will be able to see these folders. From here we need to open firmware, as I am using Linux operating system yours might be different.

- After that, we open the folder then we need to look for config.txt, as shown in the picture, and open that file into our Text editor.

- Followed by adding the below-given lines to the document. After that, you can save the document and reboot the system.
over_voltage=6
arm_freq=2000
gpu_freq=750
- If you have resolution issues you can force 1080 resolution by adding this to config.txt
hdmi_ignore_edid=0xa5000080
Example of config.txt file
# Set 'force_turbo=1' to disable dynamic overclocking and enable overclocking always
force_turbo=0

hdmi_ignore_edid=0xa5000080
over_voltage=6
arm_freq=2000
gpu_freq=750

# have a properly sized image
disable_overscan=1

# for sound over HDMI
# hdmi_drive=2
hdmi_ignore_cec_init=0

# Enable audio (loads snd_bcm2835)
dtparam=audio=on

# armstub8-gic stub for Pi4s with older firmware
armstub=armstub8-gic.bin
enable_gic=1

[pi4]
dtoverlay=vc4-fkms-v3d
max_framebuffers=2
arm_64bit=1

[all]
gpu_mem=320
Mycroft Server Pairing
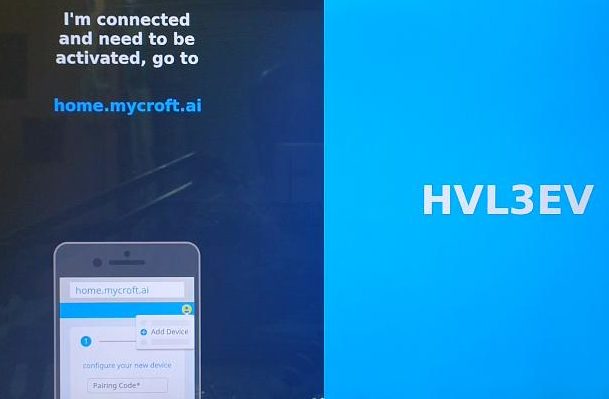
- When you first connect your rpi4 to the internet, this screen will pop up automatically. Please wait a minute or two before you get shown a code like here:

- To use Mycroft voice control, you need to pair your device on home.mycroft.ai.
- Use your PC or smartphone to pair Mycroft AI, the pairing does not need to be done from the rpi4 itself. When you have an account and are logged in, go to https://account.mycroft.ai/devices to register your Raspberry Pi 4 once.

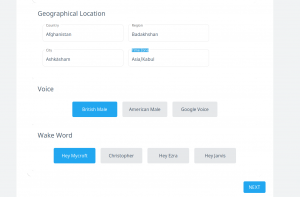
- Enter the pairing code and give the device a name and location:

- Make sure all fields are actually filled out and voice type selected to be able to click NEXT:
- Here is a complete guide for pairing a new device: https://mycroft-ai.gitbook.io/docs/using-mycroft-ai/pairing-your-device
Use Bigscreen
- Press the “HOME” Screen on your remote to exit the registration and start using Bigscreen.
- You only have to do this once. When you restart Bigscreen, it should automatically reconnect to your wifi first, then even when Mycroft mentions that it is not connected, it will reconnect after a short time once internet wifi is connected.
- Once you successfully registered the device, you can start using the Voice Apps normally.
Try e.g. saying “Hey Mycroft: Soundcloud Rihanna”.
Notes
The credentials for the Mycroft Operating system are:
User Name: mycroft
Password: mycroft
- As a new Bigscreen user, go to Apps and Skills to look for new ways to expand your box with new skills and functionality added by developers from all over the world. And now: Have fun!
Source /> plasma-bigscreen
Uninstall unwanted Apps
- Plasma Bigscreen don,t restrict the user from deleting preinstalled applications. So, you can easily uninstall the web browsers and other applications that you don’t need or require. I have removed some of the applications from my build.
Falkon web browser: sudo apt remove falkon
Aura web browser: sudo apt remove aura-browser
GAMES
KBLOCKS: sudo apt remove kblocks
EXTREMETUXRACER: sudo apt remove extremetuxracer
GLTRON: sudo apt remove gltron
SSH on Plasma Bigscreen
- To install SSH on Plasma Bigscreen os we need to use the below-given command
sudo apt install openssh-server
Chromium web browser installation
- After removing all these applications I have installed the Chromium web browser.
sudo apt install -y chromium-browser
VLC Player Installation
- You can go ahead and use VLC MEDIA PLAYER in Plasma Bigscreen OS with no problem.
sudo apt install vlc
In conclusion
- You are all set to use Raspberry Pi 4 as an Android TV replacement.
- If you face any issue regarding this article please share your thoughts.
- Enjoy using Plasma Bigscreen on Raspberry Pi 4. Smile (.”_”.)
Please check out my other articles:
- How to install Android Pie 9.0 on Raspberry Pi 4 Model B
- Netflix on Raspberry Pi 3 Model B with Android OS
- Android TV on Raspberry Pi Model B
- Chromium OS on Raspberry Pi 4 Installation and Working
Did you find us helpful?
| Subscribe our YouTube Channel | |
| Support us on Patreon | |
| Like us on Facebook | |
| Share This Article with others | |


Can I install this on a Raspberry Pi 3 B+?
This is available only for raspberry Pi 4.